I found this really cool tip as part of the BetterCloud Monitor newsletter I get on a daily basis. Did you know that there’s a built-in laser pointer in PowerPoint that you can use when you’re giving a presentation from your keyboard? Here’s how it works…
Start your presentation by using either the start icons in the Ribbon Bar or the Slide Show icon in the lower-right corner of the screen:

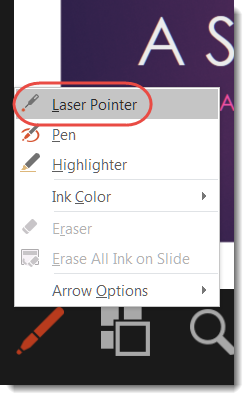
This is the screen that shows you what the audience will see. To turn on the laser pointer, click on the Pen icon under the slides:

Select the Laser Pointer option:

Now whenever your icon is over the slide, you’ll see a red dot similar to what a physical laser pointer would look like if you were presenting live in front of a projection screen:

If you find that having the red dot on your screen continuously is distracting, you can skip setting the option via the Pen icon. Just hold down the CTRL key on your keyboard and click the left mouse button. That will show the red dot as long as you hold those two keys down.
You don’t like the red dot, and would like a different color? Use the Set Up Slide Show option to change the Laser Pointer Color:

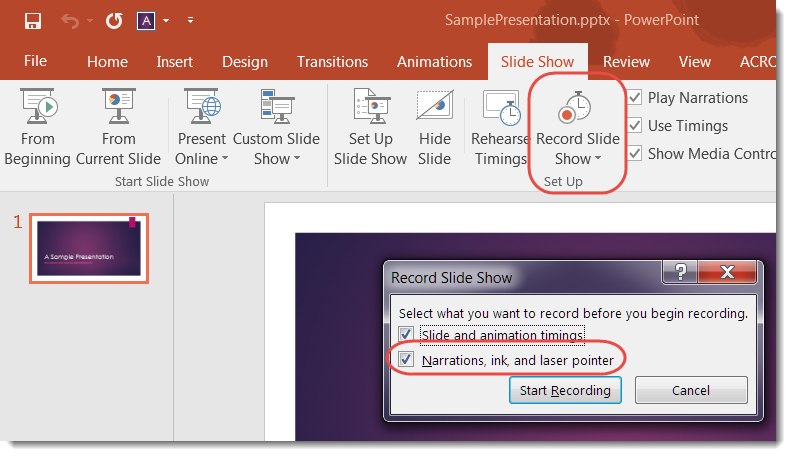
Finally… if you’re recording your slide show and want the laser point to appear (or not appear) in the finished recording), you can set that under the Record Slide Show options:

